Thursday, January 31, 2013

Science Journals Made Easy

Okay, so I used to want my students to make the best-ever, award-winningest ;) science journals, interactive notebooks, spirals....whatever you want to call them.  I tried the only put work on one side, so I can comment on the other side.  I tried mapping out different sections.  I tried just about every idea I came across.  Then one summer, I went to a 45 minute workshop on science journals, and it revolutionized my way of thinking about them.  The presenter said, just have the kids put their work in there!!!  Wow, could it really be that easy?  I had in the past NOT put everything in, because it wasn't cute enough, or awesome enough, to be included in our best-ever science journals.  So, more often than not, my journals were barely used and barely filled.  After that conference, I set out to do just as she had told us.  Have the kids put EVERYTHING in there.  Whether it was an ugly not-so-cute printout from our district curriculum or the cutest gosh darn foldable you ever did see, it didn't matter...it was going in by golly.  I have been doing this for the last four years, and it is amazing.  Now, I L.O.V.E. my class journals.  They are bursting by the end of the year with all of the learning that we did together.  They hold glued in bits of leaves and soil, drawings, graphs, foldables....literally anything we do in science.  If it is made on a piece of paper, it is getting glued in our journals.  Sometimes, I make the district curriculum handouts in a cuter font if I have time, and sometimes I don't bother with it.  They still come out perfect each year.  Now, my tips for success:

1.  As with all things teaching: Model, Model, Model.  I have my own science journal (which you can see in the group of pictures), and I do (almost) everything they do in my own journal too.


2.  Make class anchor charts, KWLs, etc. in your science journal.  Then you can pull them back out, and put them under the document camera all year for the kids to refer to.


3.  Buy stock in the glue-stick of your choice, because you are going to buy a ton of it!  Liquid glue just isn't a good idea for most things in the journal, because the pages will get stuck together if it gets too wet.  If you do have to use liquid glue, like we did for these texture hands, do the page outside of the journal and let them dry overnight.  Then have the kids glue the paper into their journal with their handy dandy glue stick the following day.


4.  Use composition notebooks if at all possible...they don't fall apart.

5.  I do make my own handouts for the students to fill out if they are doing discovery type stations, which are often not included in our district curriculum.  We set the timer for them to explore and discover, and then when the timer goes off, they record their learning on a recording sheet.  (There are examples of some I made for sound, light, and magnets in the pictures.  If you click on the picture, you can download them.)


6.  Nothing is too minor to go into a science journal.  It is literally a journal of everything they learned in science for a year, so even if it's a picture of what weather means to them....put it in there!


Good luck with your science journals!  I hope you love them as much we love ours!

Sunday, January 27, 2013

Sweet Treats Read and Write the Room: A Hunt for Words With ee and ea

Well, this week our curriculum has us teaching long e spelled ee and ea.  Last year my teammate and I did a different activity, because we were using a different curriculum.  It came up in a different time of the year, so what we had in our plans wasn't going to work. So...I decided to make another one of my favorites: Read and Write the Room!!! I made it with Valentine's Day themed sweet treats to coincide with the season.  I know my kids will love it, because we are BIG fans of read and write the room anything.  You can read here if you want to know how we do this activity in my classroom.  This one is a small activity, but super cute, so I am putting it on TpT for only $1.00.  Click on the preview picture to grab yourself a copy!


How to Remove Permanent Marker or Dry Erase Marker!


I see pins all the time about how to remove marker, but I never click on them.  That's because I already  have the answer to that nagging question.  :)  About 13 years ago I worked at a daycare.  All of the kids brought bottles of sunscreen, so that we could put it on them for outside play.  Of course we labeled all the bottles with a sharpie as they arrived, so that we would put the right kind on the right child.  The problem was, the names always rubbed off after a few applications.  I tested my theory that the sunscreen on my hands was the culprit, and sure enough I was right!  Ever since, I have used sunscreen to remove permanent marker from all kinds of things.  This works great if kids move in the middle of the year.  I can just wipe their names off of laminated name tags, book box labels, and posters.  Then I write any new student's name in their place.  Also, I used to write on the desk nameplates before I laminated them.  Sure enough, I always messed up at least one.  Now I laminate first, and then if I mess up, I can just wipe it right off.  This has worked on any smooth surface that I have tried it on, plastic bottles, laminated surfaces, dry erase boards, student desks, kidney table, etc.  It also works like a charm for dry erase markers that didn't quite erase all the way.  I often laminate game boards, and let students use markers, but after a while the dry erase leaves a red, blue, black, or green film on them.  I tell the kids that it is my magic potion, and they are in awe.  :)  I just squeeze a drop of sunscreen on a tissue without letting them see the bottle and wipe it away.  Now the pictures show Hawaiian Tropic, but it has worked with other kinds as well.  I just bought this one, because it was small, cheap, and fit in my purse.  (I also use it when I'm stuck out in the Texas sun during the summer unexpectedly, because I will burn faster than you can say boo.)  It only takes a small amount.  I have been using this teeny travel sized one from Target since last year.  I hope you find this as useful as I do!


Sunday, January 20, 2013

ABC Order Freebie and More Mystery Pictures!!!

Yippee!  I FINALLY finished my Valentine's Themed Hundreds Chart Picture Packet.  I have to sit and play around with those things forever until I can make my vision come out on the chart.  I think they are just as adorable as my Christmas Hundreds Chart Mystery Pictures, and I know my students are going to love them.  We use them for morning work while the kids are eating breakfast in the classroom.  They love to find the mystery picture, and I love to watch them try and figure it out as they going along.  See the preview below to get a peek at the eight different designs.  You can get a copy for your class at my TpT by clicking on the preview picture below.  


Meanwhile, my students are also learning how to put things in alphabetical order.  I made this little game for them to practice this skill during centers.  It is going to be a part of a larger TpT packet, but I have the game by itself for you to download by clicking on the picture below.  :)  Yay for freebies!!!  I liked all of the ABC order activities that already have, but once the students order the cards in those they are done.  This game is different, because it can be played over and over again for continued practice during center time.  To play ABC Order Grab Bag you start by printing out the picture/word cards, laminating them, and putting them in a gift bag (or a paper bag).    Then students shake the bag, pick out 6 cards and put them in alphabetical order.  Then they record the words in order on the recording sheet and draw a picture to go with each word.  They can play again and again, because there are 48 cards and they only draw out 6 at a time.  They will get new cards each time!  They have open-ended fun, and I am free to see guided reading groups.  Hope you enjoy!


Friday, January 18, 2013

Five for Friday

Hi, all.  I'm linking up with Doodle Bug's Five for Friday linky party.  My very first linky party ever...kinda nervous.  Hope I do it right!

1.  We were learning about making inferences, and I just could not find a graphic organizer that I wanted to use, so I created this little one for my firsties.  Feel free to click the picture and grab yourself a copy if you can use it too.


2.  Our students are learning how to find our country, state, and community on a map this week during social studies.  Of course we pull out the globe and explore, pull down the big maps and explore, but this is still difficult for them to keep straight sometimes.  Thanks to an idea from my sweet friend at a neighboring school, I got maps from http://www.nationalatlas.gov/printable/reference.html#list and had the kids use three crayons to outline the US, Texas, and then place a dot just south of Austin to represent our little city of Buda.  Then we practice tracing the crayon lines with our fingers to get a little more kinesthetic input in there. I also used said maps to create the tracers you see below. (click to get a copy)  The students use the tracers to draw the outlines of the country, state, and city, and then they add labels and decorate.  This really helps them remember where the borders are.  Plus, they are adorable to hang outside our classroom!


3.  I am trying to get (empty) cereal boxes to create the valentine containers you can see here on Mrs.Morrow's blog for a change from my usual this year.  I have had the notice in my newsletter for two weeks, and I only have 5 boxes.  I'm starting to get worried.  I'm about raid all of my friends' pantries, Ziploc bag their cereal, and take off with the boxes.  


4.  I am the sucker who said yes yearbook coordinator for my school.  :)  Ever since the yearbook company sent our bill, and I saw how much we owed, I have been stressing about these orders all week!  But here they are: opened, recorded, counted, and balanced.  I am happy to be done with that!  (for now anyways)


5.  Last, but not least, we used the Magic e Read and Write the room from my last blog post.  My kids love this, y'all.  I'm serious.  I want to find a way to make a read and write the room for every part of my day.  Okay, maybe not THAT much, but still.  ;)  You can pick this little activity up in my TpT store here.


All in all, it's been a great week.  I'm not gonna lie though, I'm pumped about the three day weekend ahead of me!!!  Hope you have a great one too!

Thursday, January 10, 2013

Magic e Read and Write the Room

I don't know about you guys, but my students **LOVE** any time we do read and write the room!  They are on task, focused, and just plain in the zone when we are doing it, and all with a smile on their faces.  I guess it doesn't hurt that I give them a time limit, and make it a competition either.  ;) 

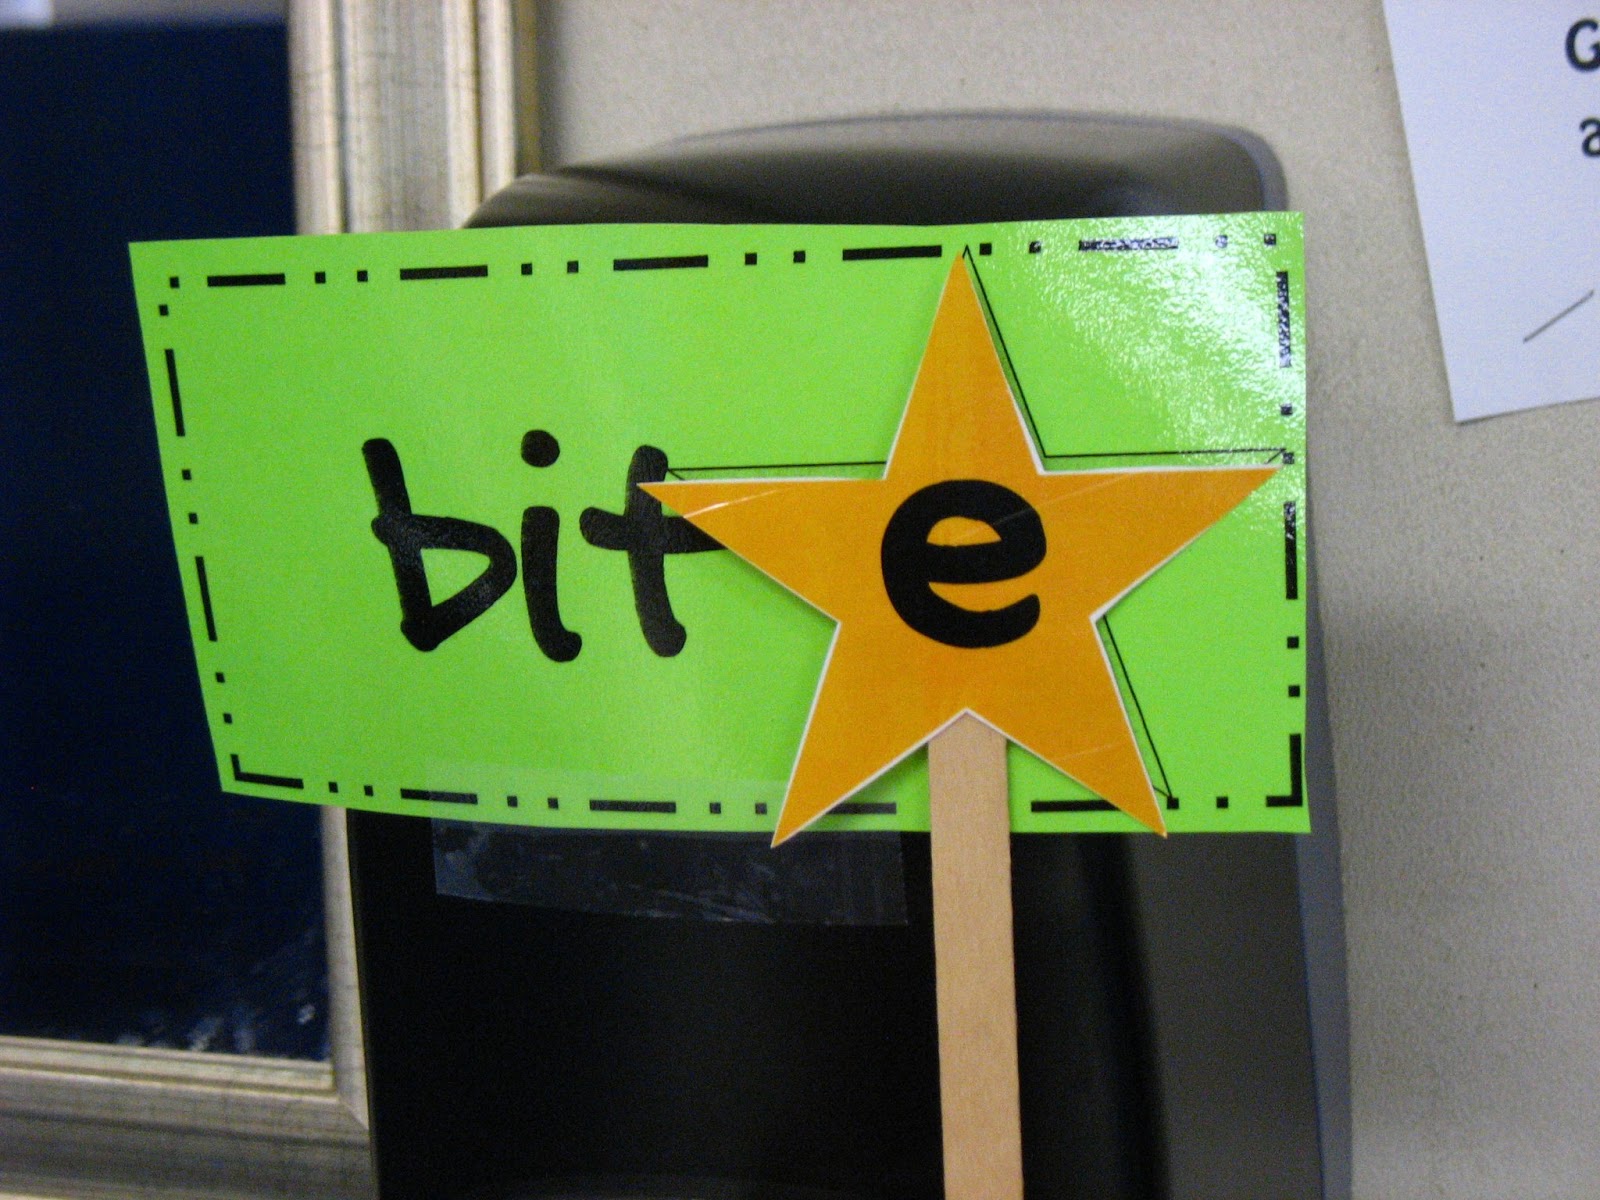
In the past I have used several versions of read and write the room activities from various teachers, and I have created some small ones for my personal use.  I decided that I would make a larger packet of read and write the room words for magic e, because it is such a huge concept for our little firsties.  You can click on the picture below to pick it up in my TpT store.  We will be working on magic e for several weeks, and I can use these babies at least once a week during that time.  Also, once we've covered all the vowels separately, I will mix them up and use them as review during guided reading for the students who are still struggling with the concept.  For this read and write the room, I combined the usual word cards, with the magic e wand I saw on Pinterest.  I made a version of the wand that is included the packet.  You will need to print one wand for each student and tape it to a popsicle stick.  (I laminated my stars before I taped them to help them last longer.)  The students will hold the wands up to the word cards to read the word, and then write it on the recording sheet.


For those of you who have never done read and write the room, this is the way we do it in our classroom.  I copy the words I am using on colored paper, laminate them, and then cut them out.  (That way I can put them in a baggie and save them for next year of course!)  Then (usually while the kids are at lunch) I hang the words around the room.  When they get in and see them they are so excited, and I start to hear the buzz.  You know the one I'm talking about.  The little whispers from several different students saying things like, "Look over there!" "Oooo...we're gonna read the room!"  "Yay!"  Iabsolutely love that sound.  I know they are just as excited to do it, as I am to watch them.  Makes my heart happy!  The kids each get a clipboard, a recording sheet, and a pencil.  They put their name on the sheet and wait for the me to give the okay to start.  I set the timer....usually for five minutes, but it can vary depending on the kids' ability levels and the number of words.  Then I say go.  They walk around the room searching for the words.  They whisper read the words to themselves, and then write them on the recording sheet.  Then they keep looking.  They are not allowed to talk to each other during this time.  If they finish before the timer goes off, they line up by me so I can check it over.  The other students continue to work until the timer goes off.  The person who got all the words first (or the student with the most words when the timer goes off if no one is finished) is the winner.  Then we go over the words as a whole group.  I'm telling you, they think it's one of the funnest things we do in our class.